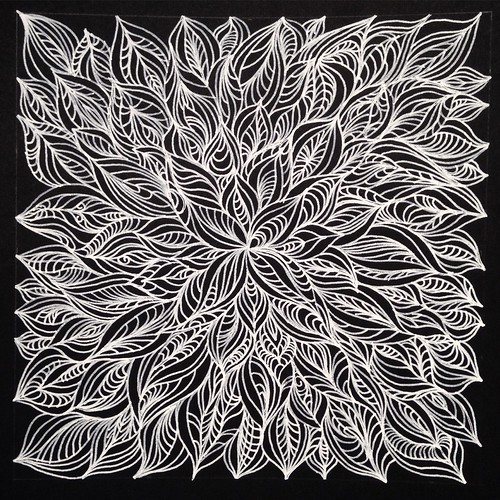
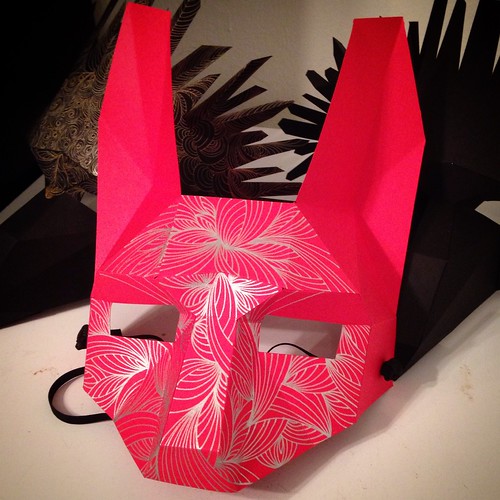
A Three Dimensional Sketchbook

I wanted to share this image because I love the way it looks. This is the view I enjoy of the table in my studio and I add to it as I create more prototypes. These pieces are sketches to work through ideas so it’s entirely appropriate for them to sit atop a sketchbook.

Sketchbook view

I am ready to move on from the brainstorming phase and begin making finished pieces.

Expanding the Paper Repertoire

Over the Christmas break I was determined to spend time in the studio exploring ideas for a new series of work in the new year. I did not manage to get in there at all because Boris and I ended up being out of town most of the time. I did take materials with me, again with this determination to work, but I never quite got around to it. I actually find it incredibly difficult to work outside of my studio because most other places are not ideal for laborious paper cutting.

Untitled

Untitled

When the first Monday of January rolled around I finally got to work, and the pieces pictured here are some of the “sketches” I put together. I’m trying to stay away from focusing on finished work because what I really need to do is play, explore, and work through ideas. It feels like I am evolving how I work with paper.

Untitled

Untitled

The pieces I have in my head are three dimensional and made from multiple pieces of paper. I’ll share more as they come together and evolve further. I like what I see in these early stages.

Work in Progress: Playing with Paper Pieces

I’ve been feeling stuck lately so last week in the studio I gave myself time and permission to play. I’ve been wanting to make compositions of three dimensional paper cut elements, and this is the idea I chose to explore. I pulled out a bunch of coloured paper left over from other projects and used these as my materials.

Untitled

I’m exploring different shapes and started with the white piece above. I want the elements to feel organic and fit together somehow. These are all very small at the moment, only a few inches long and wide, but eventually I want to work larger.

Untitled

Untitled

Untitled

I like where these experiments are going, and I will do more work with them after the Christmas holidays. I’m excited to create new and interesting work in the new year.

A Quick Drawing Fix

In a desperate need to make new work, last week I set aside a bit of time to draw. I didn’t really care about the results, as I just desperately needed the process. I drew a square outline in pencil to guide me, and then drew line after line in white gel pen. It was so satisfying to do this!

Untitled

Untitled

The finished drawing is 5″ x 5″ on an 8.5″ x 11″ piece of black card stock.

Rabbit Mask From Wintercroft

Last week I shared the Raven mask I made from paper using a template purchased from Wintercroft. I also made this rabbit mask for Boris to wear to an event we attended on Halloween.

Untitled

The rabbit mask was a bit of a collaborative process between Boris and me. He cut the pieces and I took over from there. I drew the designs using silver gel pen before scoring the folds and putting it together. I loved doing the drawings on this one.

Untitled

Untitled

I didn’t get around to doing an elaborate photo shoot of us wearing the masks, but here we are for a quick photo with the shower curtain as the background. The masks brought out the crazy eyes in both of us.

Raven Mask from Wintercroft

In preparation for Halloween night I decided to make myself a paper mask using a template purchased from Wintercroft. They are a couple based in the UK that design geometric paper masks of animals, devils, dragons, etc. and sell the templates online for people to make themselves. I bought the Woodland Animal set because I wanted to make something for Boris as well.

Of course I made the bird for myself. I used black card and decorated the pieces with metallic gel pen before putting it all together. It looks really cool.

Untitled

Untitled

I’ll share a photo of myself in the mask once I get some elastic to strap it to my head.

Work In Progress: Flowerbursts in More Colours

Here’s an idea I’ve been thinking about for awhile, what if I made more flowerburst pieces in different colours and made it an even larger installation. Sounds like a good project to work on while I’m thinking about something new.

March

There are around one hundred blue pieces in the original installation, and I’ve shown it twice this way. I like the idea of it becoming larger with multiple colours. Last week I painted some paper with yellow and red acrylic ink and started cutting more pieces. I have close to twenty of them already.

Untitled

Untitled

I don’t have a deadline or anything for this. I wanted to get working on something again and this was the project that drew me the most. It’s my version of crocheting granny squares.

Geometric Inspired Paper Cut Design

I finished this last week, and have been sitting with it as I decide what to do with it next. I’m thinking about creating a layer of line drawing to go underneath the open spaces of the triangle areas of the design. It could be too busy or it may be just right.

Untitled

Untitled

I’m happy with how well this worked out and intend to make more based on geometric design structure.

Making Paper Moths

I’ve led many artist demonstrations at Opus over the last few years, but yesterday I attended my first as a participant. Tara Galuska is an illustrator working with paper, and I was curious to attend her demo and see up close how she creates some of her work.

Untitled

She led about fifteen of us in a two hour workshop on making a papercraft moth. Tara provided us all with a template to follow and we were left to our own devices to customize our moths through paper and design choices. Below are some of the finished moths by class participants.

Untitled

Untitled

I enjoyed this class because it allowed me to work with paper in a different way than my usual approach. I love the little moth I created, and the process gave me lots of new things to think about.

Work in Progress: Geometric Inspired Paper Cut Design

A couple of weeks ago I took a one day work shop on Islamic Design with Eric Broug through Maiwa School of Textiles. I thought it would be a good opportunity to build on the pattern work I’d been doing earlier in the summer, and figure out how to draw these complex geometric designs from scratch.

Untitled

This is a piece I started a few days after the workshop, which has a six pointed star as its basic structure. I wanted to create a piece that has my standard freeform patterns within a more structured design. I’m satisfied with it so far and have yet to decide on what else to do with it.

Work in progress paper cut

The two stars are within an octagon, and everything is inside a circle. I want this piece to be a circle when I am finished with the stars more smoothly incorporated into the work. I’ve been working on this much more slowly than usual because it may not be anything other than an experiment.

I’m allowing myself the space for things to go horribly wrong, but also wonderfully right.