Doodling to the Moon and Back

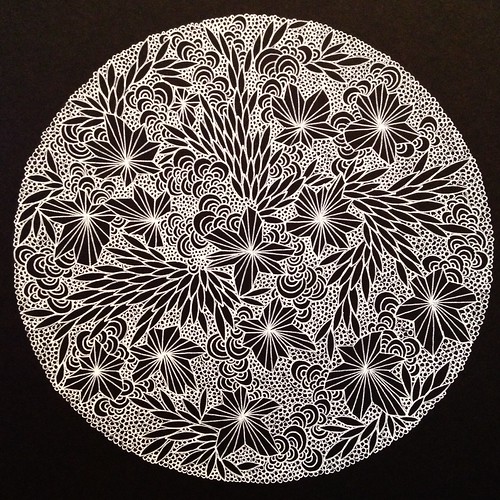
Last week I was feeling like all the work I needed to do for my upcoming show was ready to go, that is until I visited the venue again. I decided I needed a few more pieces to properly fill the space, and one of these needed to be large. I decided this was a good opportunity to work on a large gel pen drawing, which turned out to be a bit of an endurance test.

Untitled

Untitled

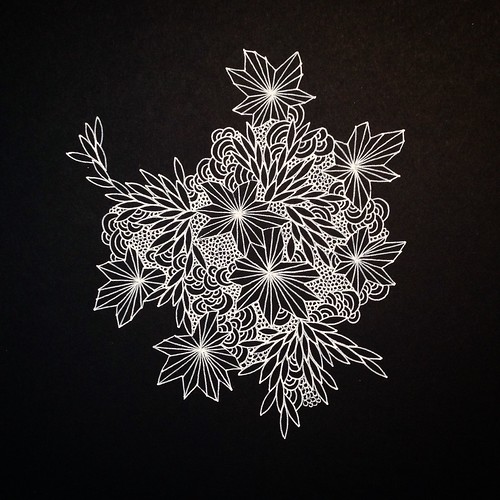
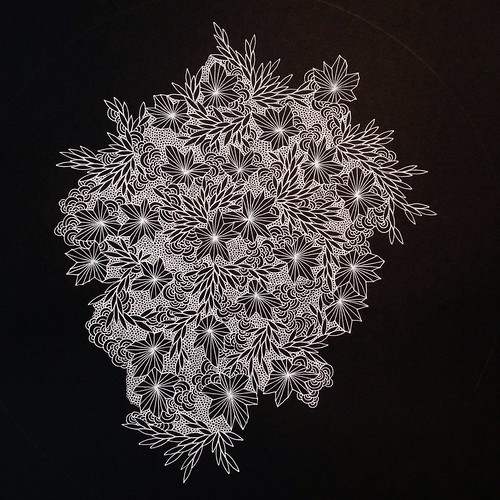
I used a white Sakura gel pen to draw on a piece of black 98 lb Canson paper with a light texture. I didn’t like drawing on this paper as much as the card stock which has a smoother surface to work on. The diameter of the circle is 13.5″ on 17″ paper, and I drew it over the course of about four or five days.

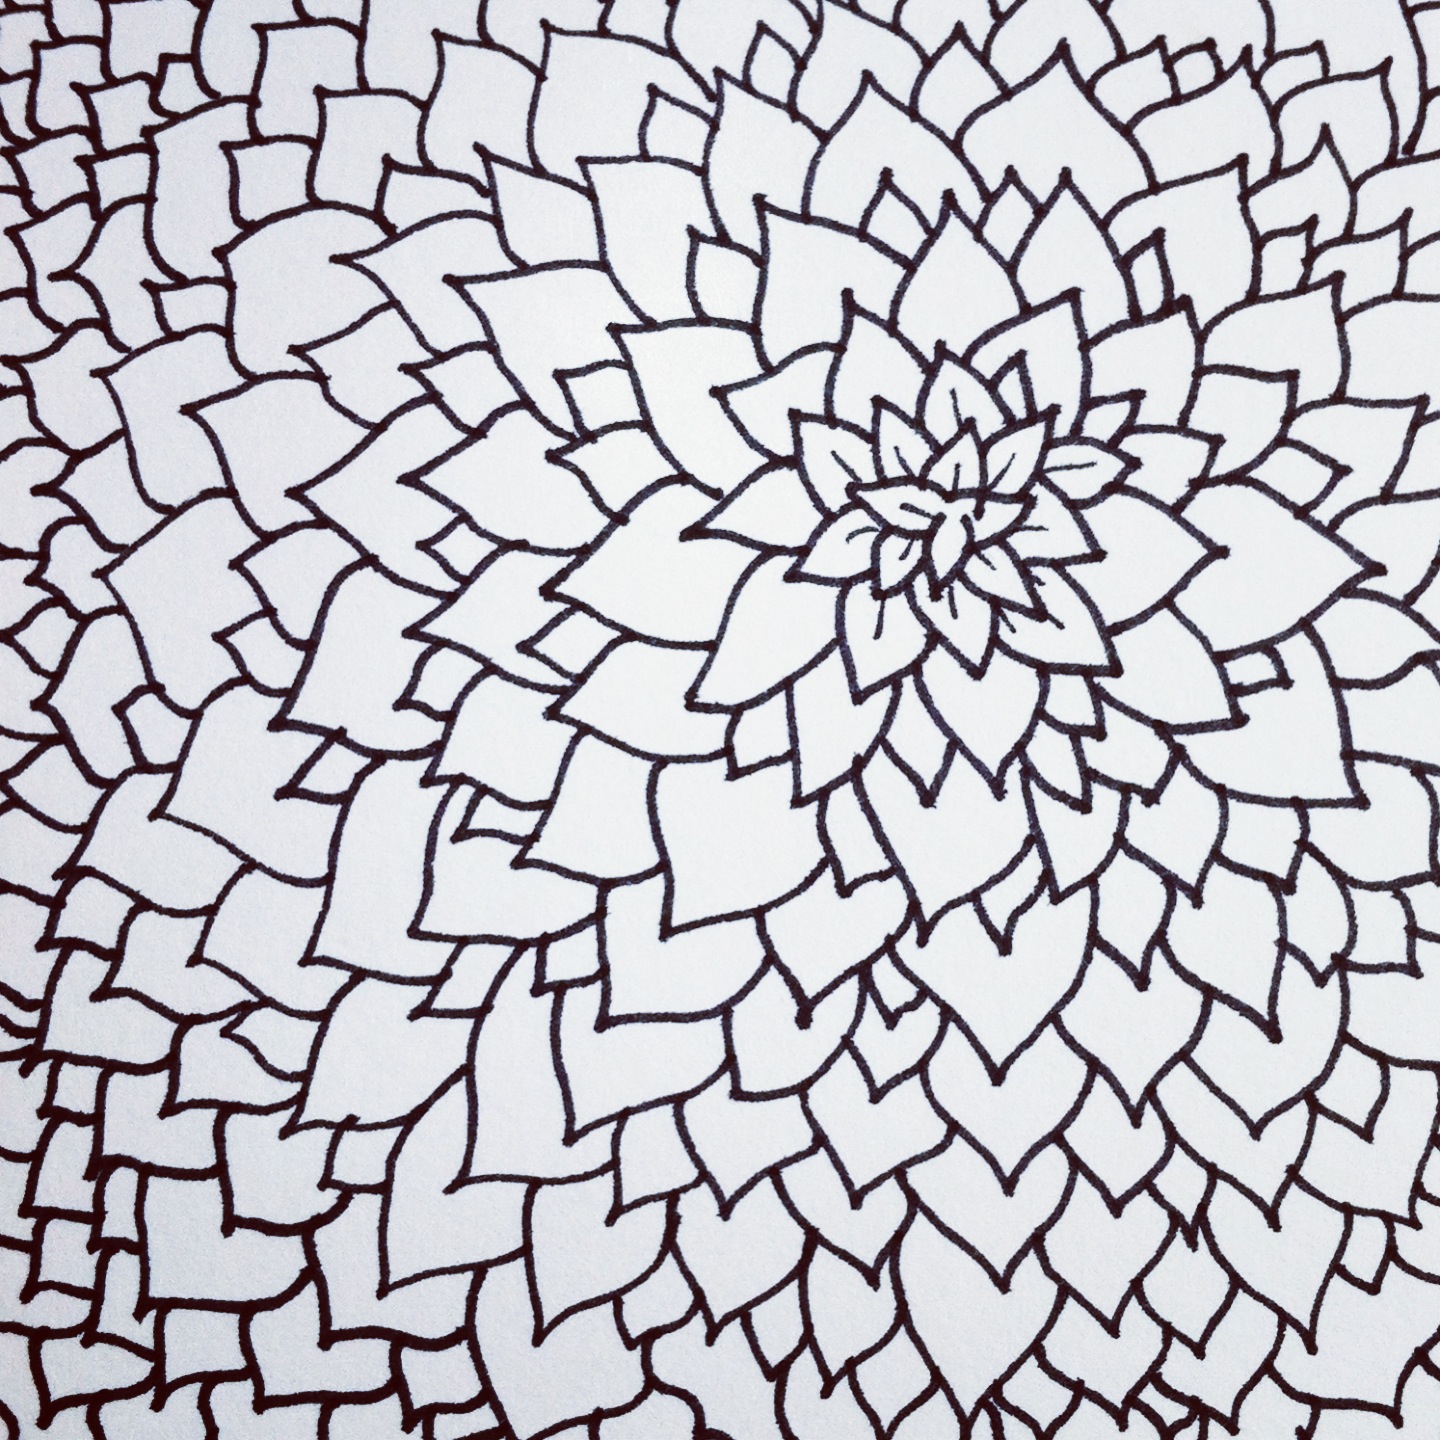
I’ve never spent so much time drawing, but my hand did not end up feeling as sore as it does when I’ve been doing too much paper cutting. That seems to take more effort.

Untitled

Untitled

I shared the collage of the four in-progress photos on Instagram a few days ago, and a few people expressed liking the incomplete versions. I like them as well, but I really wanted this one in particular to be a circle.

And just like that it is now framed and ready for the show.

Doodle Evolution

The other week I bought a white ink Sakura Gelly Roll pen from Opus on impulse, and my doodling addiction was refueled. I tested it out on a piece of scrap card stock in black, and knew immediately I needed to do more.

Doodle evolution

Doodle evolution

This series of drawings combines all the shapes I often doodle on repeat individually into one crazy composition that plays with the eyes. The white ink on the black paper seems to glow. The drawing above is the first of the full size pieces I did on 8.5″ x 11″ cardstock.

Doodle evolution
Doodle evolution

After the first drawing I decided to work towards a circle as the end result. Pictured above are the first two of these doodle clusters, both of which I completed in one sitting.

The latest of these I worked on over a few days because I didn’t have enough time to work on it in a single sitting. The photos below are how the piece evolved as I worked on it.

Doodle evolution
Doodle evolution
Doodle evolution

In the process of working on all of these drawings I’ve used up the first Sakura pen I purchased and returned to Opus to buy more. These pens feel so lovely to move across a smooth surface, which is why I love to draw with them.

I am very pleased with this series of drawings and have decided to include some of them in my upcoming show at Kafka in October. More details to come about that…

Microcosm Series

I’ve chosen Microcosm as the working title for this series, and will see if it changes as things develop further. This is actually the third of four pieces I’ve created over the last week. It’s the second circle while the remaining two I haven’t shared on the blog are triangle shapes.

Untitled

Untitled

I’m enamored of the metallic gel pens I use to draw with. Partially it’s the colours and how they catch the light (ooh shiny!), but I also love the feel as they glide over the surface of the paper.

Untitled

Untitled

The circle is about 4.5″ in diameter on a piece of 8.5″ x 11″ cardstock. I’m enjoying the creation of these small quick pieces while I take a break from the larger, more energy consuming ones.

Under the Microscope

The ideas explored in the sketchbook work I shared last week quickly made it’s way into finished pieces. I’m still working at a small size on these (5″ x 5″) because I find the drawing intense even though I’m marking making with simple circles. It’s the tight repetition that is the killer on my hands.

Microcosm

Microcosm

A friend remarked on Instagram that the series feels like looking through a microscope. This is exactly what I was thinking about these drawing/paper cutting compositions, and it will probably inspire a related title for this series.

Microcosm

Microcosm

I have completed two more pieces for this series, and will share more later this week.

Sketchbook Peek: Paper Cut & Drawing

A preview of two experiments in my sketchbook combing paper cutting and drawing that recently led to finished pieces (not pictured here).

Untitled

Untitled

These are small, about 4 or 5 inches square, and I used those metallic gel pens I so love to draw with. The tiny circles are just the thing I often doodle obsessively, and once filled a page with them using pencil.

I’ve decided to include a series of small pieces like these in my upcoming fall show.

The Power of Making

My partner Boris is a far superior cook than I, mostly because he has a passion for the activity whereas my passion for food lies more with the eating of it. Over the five or so years we’ve lived together I’ve steadily handed off the bulk of food preparation to his care, and been very glad of it. I enjoy his good cooking, while he enjoys a clean home and clothes.

This past December I came to the realization that I found the activities of cooking or baking to be extremely stressful. The reason why is because I did these things so rarely I was out of practice and had lost my confidence in working with food.

photo 1 (5)

I am surrounded by people who are excellent chefs, and I am lucky to share many good meals made by friends, so I suddenly felt pretty shameful about the sad level my food skills had sunk to.

Immediately I made the decision to turn things around. I have been cooking and baking much more often over the past two months, including trying recipes for things I’ve always wanted to make but hadn’t previously tried. (I’m looking at you Lemon Loaf and Okonomiyaki).

photo 2 (5)

The situation had me reflecting upon the empowering nature of making things by hand. I should never be afraid to try something new, or have the expectation for perfection. I understand this intimately when it comes to art and craft processes, but it also applies to working with food. Thank goodness for the Christmas baking epiphany because now I am empowered to enjoy the creation of food as much as I love the consumption of it.

Drawing As Meditation

Earlier this year (which feels like eons ago) I bought a small sketchbook with the intention of getting into drawing again. I’d intended to do it at least once a day but quickly discovered I didn’t really have the time to dedicate to it regularly. Last week I took a break (one where I just allowed myself free time to do whatever I wanted) and managed to pick things up again.

I think of these as doodles rather than drawings, mostly because they are not “for” anything other than the process of creation. They suit my obsessive nature as an artist, and I think of them as meditative drawings. I was curious to discover this is actually a thing.

doodle2

doodle

It is very calming to draw without intention. I often start with a very loud mind and slowly it will quiet the more I draw. I have the same experience when I cut paper.

photo 1 (1)

photo 2 (1)

These are just a few of the doodles I created last week. I’m hoping to maintain doing these types of drawings as part of my practice going forward.

The Seeds of Sewing

Over the summer months I’ve gotten into sewing, purely out of a desire to spruce up our apartment. I’ve had a few little projects in mind for ages but until recently I didn’t have my own sewing machine.

For home improvement project number one I wanted to make new slip covers for the throw pillows that came with our couch. I’ve always disliked the fabric, but rather than buying new pillows I decided to sew covers and choose a fabric to add more colour to the room. Dressew was my source for the bold yellow fabric I came away with.

Untitled

Slip covers for the throw pillows on our couch

I sewed them without a pattern but found some ideas online to use as reference. Anne advised and assisted me with the sewing as it’s been a really long time since I’ve used a sewing machine. We finished them in about an hour and a half.

The slip covers were the gateway project that led me to buying a sewing machine of my own, because I knew I wanted to make more things. I went with the tiny and inexpensive SY sewing machine from Ikea because I’d read a review that recommended it as a good starter machine.

Untitled

And the next thing I knew I was sewing curtains for the bedroom, once again using fabric sourced from Dressew. As with the pillow cases I did not use a pattern. I kept things simple with minimal detail, and sewed together the patterned fabric with a white backing to block out light. My hanging solution was to purchase curtain rings to clip to the top and not have to fuss about with something more complicated.

Untitled

Bedroom curtains

I still have so much to learn about sewing, but at least I am learning as I go. I have another project in mind, still sticking with simple straight lines, but eventually I hope to tackle making my own clothes.

Translating Paper Cut Work Into Laser Cut Designs

Last week I booked a time slot at the Laser Cutting Cafe to try out having some of my paper cut work fabricated into other materials. I took two files with me to experiment with and came away with some very lovely results.

Since my previous visit to the Cafe, Derek (the owner) had acquired an even larger laser cutter than the previous two he has on site. It has a larger bed and a more powerful laser, and this is the machine I worked with.

Untitled

Here you can see the file of my artwork on-screen. To create it I scanned the original, cleaned it up in Photoshop and then converted it into an outline using Illustrator. The highlighted bit indicates the area where the laser is currently positioned as it cuts.

Untitled

Untitled

Untitled

I created two version of this piece using different materials. One is cut into an 8″ x 8″ wood cradle panel, and the other is etched into the surface of a piece of white mat board. I sized the artwork smaller than the original and I think some of the pieces that make up the word were a bit too tiny for the laser so there is some fine detail missing. Overall though, it is amazing to see this work translated into other materials.

Untitled

The second artwork file I brought with me was the one I most wanted to see. I scanned one of the repeating crescent paper cut designs I’d created last year for the culture crawl, and chose a piece of 20″ x 12″ bamboo board to cut it into.

Untitled

Untitled

Watching the laser cutter reproduce something I’d made by hand was pretty weird but exciting. It took about half an hour to complete because the design is so intricate, and the material is fairly thick.

Untitled

The finished piece is fantastic and so very beautiful. It smells a lot like a campfire, even days later.

Untitled

Untitled

I am so pleased with this experiment because it confirms a few ideas I’ve had around translating much of my work into other more durable materials than paper. The possibilities are endless.

A Visit to the Laser Cutter Cafe

For awhile now I’ve been contemplating the idea of translating my paper cut work into other materials through laser cutting. I wasn’t really sure how to go about this, or even where to do it, that is until I heard about the Laser Cutter Cafe.

Untitled

Untitled

The cafe is located in the Chinatown Experiment pop-up space on Columbia Street in Chinatown. It’s there temporarily until the beginning of August, and the purpose is to expose people to the mind-blowing experience of using a laser cutter. I dropped by on Wednesday afternoon for a one-on-one Basic Usage Tutorial (at a cost of $25), which is a thorough run-through on safety, and how to use the hardware and software of the machine.

Untitled

Untitled

The laser cutter can do anything from engraving a material to cutting out complicated shapes. As part of the tutorial I was allow to create a quick design and then watch as the laser cutter rendered this onto a scrap piece of mat board.

Untitled

Untitled

Here you can see the design on screen, and in the video below you can watch as the cutter embosses it into the material. It was fascinating.

A close up of the two different versions of the same design. The cutter can work with a wide range of materials such as paper, acrylic, wood veneer, felt, cork, etc, as long as it is a 1/4″ thick or less. The maximum size that can fit into the cutter is 20″ x 12″ because that is the size of the bed.

Untitled
Untitled

Now that I’ve tried out a laser cutter I have a good idea of what I can do with it, and how it can enhance my current body of work. I’ll definitely be back at the Laser Cutter Cafe soon.