The Leeway Studio Residency: More Screen Printing and Sculpture

Last week at The Leeway Studio I worked on a new batch of layered screen prints with the intention of turning these into more small pyramid shapes. I did five or six different layers of colours and shapes on the paper, and ended up with some very sloppy prints. These are photos of that work in process.

Untitled
Stencils cut from butcher paper.

Stencil pulled away from the screen
Stencil and screen covered in ink.

Screen print on newsprint
A detail of an ink test on newsprint.

Screen prints cut into pieces
Pieces of the finished prints cut into pyramid templates.

At the end of my session last week I’d only just begun to cut the paper into pieces, and will work on assembling some of these this week.

Work In Progress: Pattern Paper Cut Installation

I’ve been slowly continuing to work on the installation of paper cut patterns that I started at the beginning of the summer. This are some of the recently completed pieces.

Untitled

Japanese pattern design

Islamic pattern design

Work in progress: Paper cut patterns

I still have a looooooong way to go before there is enough individual pieces to make a substantial installation.

The Leeway Residency: Transforming Prints into Objects

Some of those screen prints I shared recently have been transformed into an army of tiny pyramids. I started out with the idea of turning one print into a single 3D object but decided to maximize the paper by making multiple small 3D objects from each prints.

Untitled

The first image above is of the larger piece I started out with next to my first tiny pyramid. I made about sixteen of these last week while working at The Leeway studio.

Untitled
Untitled

This week in the studio I decided to use up the remaining prints to make as many of the pyramids I could. They are each unique in pattern and it’s interesting to arrange them into a variety of configurations. I love them so much more now than I did as prints.

Untitled
Untitled

I keep wishing I had enough prints to make about one hundred more of them because that many tiny pyramids would look amazing!

The Leeway Residency: Screen Printing Too

The screen prints pictured here are tests to see how the paper I use in my paper cutting work will take to the ink. I wanted to see how much this type of paper would warp, and what it will be like to cut with the ink on its surface. It has actually held up pretty well.

Untitled

I cut two of the same stencils using a compass cutter and didn’t worry too much about a design. This is four layers of ink using the two stencils. I used the same colours as with the previous batch of prints.

Untitled

Untitled

The next step is to see what this paper is like to cut.

The Leeway Residency: Screen Printing

This week I’ve been doing screen printing during my time at The Leeway, and OMG (!!!) do I love the pieces I produced. My intention was to rework some initial prints I did about a month ago which I wasn’t happy with. I cut a few simple stencils at home using craft paper and decided to print multiple layers over the same paper and see where things would end up.

I tried screen printing for the first time about a month ago, and only now do I realize I didn’t share any of that work on my blog (but I did post it to Instagram). I was given a lesson in screen printing stencils by Vanessa Hall-Patch, the Shop Technologies Coordinator at The Leeway studio. She is an expert at printing processes and I feel lucky to have access to her advice and knowledge as I mess about.

Untitled

Untitled

Untitled

The first set of prints above ended up being about six layers of ink using three different stencils. I made my decisions about colour and composition on the fly, and used remains of ink Vanessa brought for me from the print making studio downstairs. It was enjoyable to have access to so much colour!

Untitled

Untitled

Untitled

The second batch of prints has five layers of ink and was done with three stencils (two are identical because I cut multiples at the same time). I worked in the same way as the first batch of prints, making things up as I went and stuck with the same colour scheme because I liked it. This series of prints is my favourite of the two.

My original intention was to rework these prints with more colour and texture, and eventually transform the paper into a three dimensional object. Now I like them as they are, and I’m not sure if I will go ahead with my plan.

Modular Origami With Colour and Pattern

Earlier this week I mentioned recently spending time in the studio experimenting with more paper crafting techniques. I shared the iris fold piece in a previous blog post, and now here is a modular origami sculpture I started on the same day. I think working with the colourful patterned paper, with dots on one side and stripes on the other, was half the fun.

Untitled

Untitled

Untitled

This project is inspired by a tutorial I’ve had booked marked on Pinterest for months -> DIY Origami Art by Coco Sato for Design*Sponge Her version is more elegant than mine, but I think the crazy colours and textures make it more interesting.

Playing with Colourful Origami Paper

Last week in the studio I made time to finally try a few of the paper folding tutorials I’ve had booked marked for ages. The purpose is to expand my repertoire of paper manipulation techniques and increase my skills.

Colourful origami paper

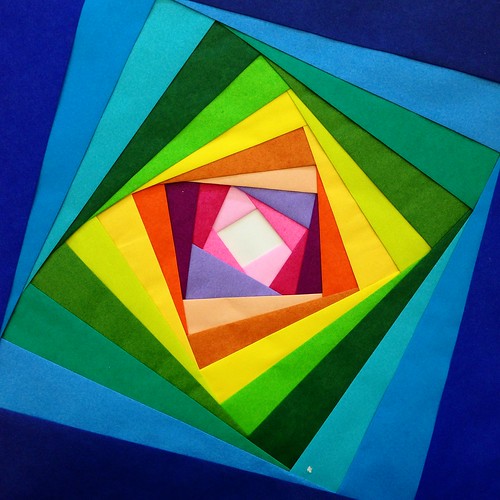
The project I’m sharing here is called Iris folding and I followed this tutorial on Creating Colourful Book Covers to do it. The design looks complex but it is actually simple. I used twenty-two pieces of origami paper, with twenty-one of them cut in half to create the layers.

Untitled

Untitled

Untitled

The final photo here is of the back, and you can see what I mean about layers. The look of this pattern reminds me strongly of a quilt design, but I always feel textile and paper work is similar.

The Leeway Residency: Halfway Point

I haven’t been working on my pattern paper cut project much over the last three weeks because I’ve been focused on other things. But yesterday I finally made time to work on transforming the flat pieces into 3D, and how to connect them together. This is the part of the project I’ve been procrastinating madly, all the while working on it in my head.

I scored the paper and folded the three pieces into half boxes, and used painters tape because I didn’t have archival glue on hand. I’m still not sure if I will glue each box or assemble them with tabs. If they are glued it makes them more difficult to store and ship, while with tabs I can take them apart to make them flat.

Prototype pattern paper cut installation

Prototype pattern paper cut installation

Prototype pattern paper cut installation

I won’t go into details about how these are attached to one another, but they aren’t glued or taped. I love playing with materials and problem solving. The goal is to make this a modular installation of small pieces that fit together to make a larger whole. With this prototype I can see the idea is going to work.

The Leeway Residency: Update on Progress in Week Five

When I was working in The Leeway during my open studio on the weekend I completed my ninth paper cut pattern. I am pleased to have reached this point already, though I am trying to finish two to three of them a week these days.

Untitled

I made the decision to incorporate a wider variety of patterns and distinguish them by category using colour. Going forward all of the Japanese patterns will be cut from black paper and the Islamic ones will remain white. This means I need to redo all of the Japanese designs I’ve already cut, but I’ve moved forward with cutting new ones from black paper, some of which are pictured here.

Untitled

Untitled

At the moment I’m still holding off on sorting out the three dimensional aspect of this installation, but I do have some interesting solutions in my head for how to do it.

Instagram Photos In Print With Chatbooks

Chatbooks is an online service that turns your Instagram photos into printed books. They sent me a complimentary photo book last week to share with my followers and promote the service.

The book is 6″ by 6″ square with about sixty of the photos I shared on my Instagram account between April and December 2014. Each page includes a photo with corresponding location data, date the photo was shared, and the caption used on IG. More about their Instagram books here.

Untitled

Untitled

The print quality is really good especially considering the resolution of photos shared on Instagram. These are the the printing specs from their website:

  • 100 lb. matte cover
  • 100 lb satin coating paper for interior pages
  • Ink certified by Wilhelm Imaging Research to resist fading for more than 200 years

If you’d like to see your own Instagram photos collected into a cute little book visit the Chatbooks website and use the offer code: racha630. You’ll get your first book FREE.

Find me on Instagram!