Learning The Art of Kumihimo

I am so grateful Vancouver has Maiwa and their school of textiles because they manage to bring to town so many interesting and skilled artists from all over the world to do talks, teach workshops, and share their work. When I looked through their latest brochure earlier this year I knew I wanted to take a workshop, but it was a toss up between embroidery and learning something totally different. I went with a two day workshop on kumihimo with master artist Makiko Tada, simply because her work seemed so compelling.

Kumihimo is a braiding technique traditionally used as functional and decorative ties for samurai armour and swords, and in current day are used for tying obi and haori jackets. My hands-on experience in the workshop demonstrated to me that kumihimo is essentially small scale weaving, and can get incredibly complicated.

Kumihimo workshop with Makiko Tada

Kumihimo workshop with Makiko Tada

Some participants came to the workshop with their own marudai, which is a wooden stand, but everyone was given a foam disk marked with notches and numbers to work with. This was more my speed since I am not a weaver and many in the class were. Our first project was to work with four strands of yarn in two different colours to create the most basic of braids.

Kumihimo workshop with Makiko Tada

Kumihimo workshop with Makiko Tada

Our next project took things up a few levels as we worked with twenty-four strands of silk thread, divided into sections of three per notch and long enough to wind up into bobbins. That’s when things got really complicated as we quickly went through four different kumihimo patterns to try and master by the end of day one. Some I was able to get my head around and others were totally confusing. It’s hard to explain but you use both hands to braid and they  move around the disk in specific movements, usually in the opposite direction. My brain was totally exhausted by the end of day one, but I came back for more in day two.

Kumihimo workshop with Makiko Tada

Kumihimo workshop with Makiko Tada

Makiko also brought in many samples of a variety of different braids done in different fibres, and vibrant colours. It was inspiring.

Kumihimo workshop with Makiko Tada

Work by Makiko Tada

Kumihimo workshop with Makiko Tada

Work by Makiko Tada

Kumihimo workshop with Makiko Tada

Work by Makiko Tada

I completed three braids by end of day two that I am happy with, which are pictured below. I decided to stick with the simpler patterns and really get a handle on the technique because there was no way I was going to get my head around the five different designs we were shown. We were given beautiful supplies to take home for further work, along with two different disks to work with.

Kumihimo workshop with Makiko Tada

Kumihimo workshop with Makiko Tada

I’m glad I took this workshop because it was super challenging and different from most of the textile work I’ve learned so far. I’m not sure what I am going to do with this going forward but I definitely need more practice.

10 Good Things From The Weekend

I used to do this series of posts on my previous blog called, “10 Good Things From The Week/Weekend”, that I’m hoping to revive here going forward. The past few months have been a struggle on many levels, and it’s been important for me to focus on the good things in my life and cultivating a sense of gratitude.

So here goes…

  1. Having plenty of unplanned time that I easily filled up with plans
  2. Visiting the Richmond Night Market with friends and eating all the things
  3. FaceTime with my mom
  4. Finishing two really good books by the end of the weekend
  5. Seeing Mo Kelman’s excellent show at the Silk Weaving Studio
  6. Wandering Granville Island with Boris on a warm sunny Saturday
  7. Catching up with Simone over tea and coffee on Saturday morning
  8. Handing over the proposal I’ve been worrying over for the past few weeks
  9. A long much-needed nap on Sunday
  10. Steak for dinner, made by Boris

Cute Fox Embroidery Kit by Kiriki Press

I bought this embroidery kit by Kiriki Press at the Paper Place when I was in Toronto earlier in the year. I loved the cute design and thought it would be a good practice project to brush up on my embroidery skills. But when I started working on it in July I was really frustrated by the small scale and having to follow a pattern. I set it aside for most of the summer and then decided to have another go at it this weekend.

Kiriki Press embroidery kit

Kiriki Press embroidery kit

I’d been lamenting my lack of productivity last week so I really wanted to work on something. I somehow managed to get past my frustrations with this kit when I took it out on Saturday, and made my way through all of the embroidery by mid-afternoon on Sunday. This was between going out for walks, naps, swimming at the beach, reading, and eating. I learned new stitches – the chain stitch and the ladder stitch – and fell in love with the little fox in the process.

Kiriki Press embroidery kit

Kiriki Press embroidery kit

The kit comes with a back piece and stuffing to turn the fox into a very cute little softie. She is about six inches high, and is a lovely addition to my small collection of handmade toys. The first I’ve made myself!

A Visit to Fort Smith

While I love to travel, and don’t do it often enough, I really hate flying. I haven’t travelled on my own in a long time so as I waited for my flight to Edmonton I was feeling nervous and anxious about the two flights I’d have to get through in one day before I reached Fort Smith. I shared a quick shoe shot on IG as I was boarding my flight, and expressed my fears to the universe and was touched to read all the lovely encouraging comments when I landed.

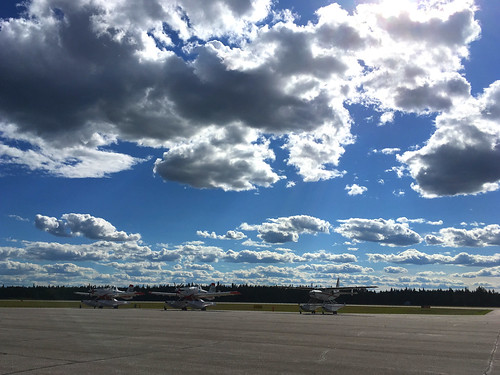
The flight to Edmonton was smooth, but the flight to Fort Smith was in a small twenty seat plane. Landing and take off were slightly terrifying but I made it through with a death grip on my seat. The photo below is the hot and sunny day that greeted me at the Fort Smith airport.

Fort Smith airport

Most of my trip was covered by the Northern Life Museum and Cultural Centre, and it was the museum’s director, Jeri Miltenberger, who showed me around the town. I was not expecting to be so looked after while I was there, but it’s a small town with not many places to eat. It’s also difficult to get around to some of the sites without a car. Jeri made sure I ate well, met people, and got to see wonderful things when I wasn’t teaching the workshop.

Slave River

Slave River

Slave River

Slave River

Fort Smith is located beside the Slave River, which is a huge body of water with a series of easy to dangerous rapids near the town. The northern most river pelican colony nests here during the summer, and I was able to see them from afar in the spot where they feed at Rapids of the Drowned. There’s also a small population of Whooping Cranes in the area but people aren’t permitted to visit them because they are endangered.

Pelican

Pelican on display at Northern Life Museum and Cultural Centre

Whooping Crane

Whooping Crane on display at Northern Life Museum and Cultural Centre

It rained on the two workshop teaching days, and sporadically on my final day in Fort Smith. Jeri took me for a drive out of town and into Wood Buffalo National Park, which is just over the border in Alberta. We made a few stops along the way to gather sweet grass, see and taste the Salt River, and drive past a massive Bison bull walking along the road (video here). He looked about six feet tall and eight feet long. It was an amazing site.

Salt River

Limestone Cliffs and Salt River

Bison bull

We drove into the Pine Lake campground and walked around the water. The level of the lake has become low enough over the past few years that it has transformed from one long lake to a series of three bodies of water barely connected by a trickle of water. Jeri mentioned the Slave River water level is also much lower than it used to be. It has been a very dry and hot summer for the area, much more than is usual.

Pine Lake in Wood Buffalo National Park

Pine Lake in Wood Buffalo National Park

I was impressed by the quality and craftsmanship of the beadwork and embroidery on display in the museum (pictured below), and available for sale in one of the shops. I wish I was as good as the examples here. I came home with a beaded needle case made from moose hide, and a birch bark basket as keepsakes from my trip.

Beading and embroidery

Beading and embroidery

On my final evening the weather cleared enough for us to see this spectacular sunset over the Slave River, and the next morning I did the long trip home. I was much more relaxed about the two flights home because I knew what to expect.

Sunset over Slave River

I am so grateful to Jeri and the Northern Life Museum for providing me with the opportunity to visit the North, and for being such generous hosts. I hope I can visit again someday.

Scenes From a Paper Cutting Workshop in Fort Smith, NWT

I had the pleasure of spending five days in Fort Smith NWT and teaching a paper cutting workshop there this past weekend. I was hosted by the Northern Life Museum and Cultural Centre as part of their annual Summer Splash Festival. It was a two day class to introduce students to a few different techniques with the goal of completing a multilayered paper cut design in a self contained shadowbox by the end.

Paper cutting workshop in Fort Smith NWT

Paper cutting workshop in Fort Smith NWT

Paper cutting workshop in Fort Smith NWT

We started with a few small projects such as kirigami from origami paper and then working with pattern templates and card stock to get a little cutting practice in. I think everyone created beautiful pieces, and then they were ready for the big project.

Paper cutting workshop in Fort Smith NWT

Paper cutting workshop in Fort Smith NWT

Paper cutting workshop in Fort Smith NWT

Paper cutting workshop in Fort Smith NWT

I brought the rabbit prototype I had made earlier in the summer along with an abstract sample (I haven’t shared), and then helped guide people on their own layered project. The photos below are some of the different work in progress by various participants. It was gratifying to see these come together in the end. I didn’t manage to get photos of everyone’s work.

Paper cutting workshop in Fort Smith NWT

Paper cutting workshop in Fort Smith NWT

Paper cutting workshop in Fort Smith NWT

Paper cutting workshop in Fort Smith NWT

Paper cutting workshop in Fort Smith NWT

Paper cutting workshop in Fort Smith NWT

It was a great experience teaching this two day workshop. I hope to organize one somewhere in Vancouver later this fall.

I’ll share more photos from Fort Smith in another blog post.

Cut Up Cut Out at Bellevue Art Museum

I’m back from a short trip to Seattle to visit friends and see art. A highlight of gallery hopping from the past few days was to see an incredible show of cut paper art at the Bellevue Art Museum, titled Cut Up Cut Out. All of the best known artists working with cut paper are in this traveling show put together by Bedford Gallery in California. I’d been dying to see it since I first learned it would be showing in Bellevue.

It is a fantastic show featuring a wide variety of artists, and beautifully showcases the art of paper cutting. I really wish my own work had been included in this exhibition, but I am not well know enough. I’ve included photos here of sixteen of the many pieces from the show.

Photos of Cut Up Cut Out at Bellevue Art Museum
Sara Burgess, The Numbers Book

Photos of Cut Up Cut Out at Bellevue Art Museum
Yuken Teruya, Notice-Forest (Tiffany)

Untitled

Lauren Kussro, Tart Crispy Greens


Photos of Cut Up Cut Out at Bellevue Art Museum
Barbara Wildenboer, Dark Paradise 1

Photos of Cut Up Cut Out at Bellevue Art Museum
Maude White, Sonja

Photos of Cut Up Cut Out at Bellevue Art Museum
Meg Hitchcock, The Most Secret Supreme Truth

Photos of Cut Up Cut Out at Bellevue Art Museum
Donna Ruff

Photos of Cut Up Cut Out at Bellevue Art Museum
Cal Lane

Photos of Cut Up Cut Out at Bellevue Art Museum
Wim Delvoye, Untitled (Car Tyre)

Photos of Cut Up Cut Out at Bellevue Art Museum
Rogan Brown, Small Kernal

Photos of Cut Up Cut Out at Bellevue Art Museum

Claire Brewster, A Parliament

Photos of Cut Up Cut Out at Bellevue Art Museum
Jenn Stark, Holographic Circle

Photos of Cut Up Cut Out at Bellevue Art Museum
Andy Singleton, Nebula Form II

Photos of Cut Up Cut Out at Bellevue Art Museum

Lyndi Sales

Photos of Cut Up Cut Out at Bellevue Art Museum
Simone Lourenço, My Universe, Blue

Photos of Cut Up Cut Out at Bellevue Art Museum
Charles Clary

Cut Up Cut Out continues at the Bellevue Art Museum until October 27th 2017. Read more about it here.

Making a Beaded Tassel Necklace

Look at this lovely beaded tassel necklace I made over the weekend with my friend Amanda. We’d both been thinking about tassels recently so she decided to host an afternoon of making over the weekend. I think it took about an hour or so from start to finish, and the beading was the most time consuming part. I love small projects like this, with quick results.

Making a tassel necklace

Making a tassel necklace

I bought myself the tool pictured above, called Loome, which is a multi-purpose tool for making tassels, pom poms, and other small textile projects. Check out more information about it on their website. I’m about to embark on a tassel making kick, because you can never have too many, right?

Scenic Summerland

Boris and I went away to Summerland with friends over the Canada Day long weekend. It has been many years since I last visited the Okanagan, and I’ve never previously explored this tiny town where our friend grew up. The weather was super hot, and Lake Okanagan was the perfect place to cool off in the afternoon.

Untitled

Untitled

Untitled

Untitled

We wandered, explored, snacked, napped, read books, and went swimming. The perfect way to spend a summer long weekend.

Thirty Days of Drawing Project – The Conclusion

The Thirty Days of Drawing Project came to a conclusion on June 24, 2017 at Day fifty-five. This video includes work from June 13th through to the 24th. The final page ended up in colour because I had previously used it for a marker test and decided to incorporate this into the drawing. I did a few variations of previous drawings because I love to iterate.

A post shared by Paper artist (@rachael_ashe) on

And now I have been taking a break for the summer and thinking about what to do next. There are many drawings I have plans to turn into paper cut work.

Watch the previous sketchbook videos here: Part 1, Part 2, Part 3.

Sashiko Patterned Pillow

I look at this finished project sitting in our green chair and part of me can’t quite believe I am the one who made it. I finished stitching the sashiko design over the weekend and felt intimidated to tackle sewing it all together. I am much more comfortable with hand sewing over machine sewing, but I also needed to learn how to do an invisible seam. It’s something I had never done before but I found this helpful video to guide me.

Here’s the pillow after I sewed two of the sides on the sewing machine and was about the start using an invisible/ladder stitch to sew the whole thing closed over the pillow form.

Untitled

Untitled

When I was finished, I held the pillow over my head and did a victory lap around the apartment to celebrate. It felt like a HUGE accomplishment to make this simple object.

Untitled

Untitled

Now that this is done I am either going to tackle the embroidery kit I also bought in Toronto, or begin a new freeform stitching design on a piece of clothing.